1-800-335-3431 Sign Up For Our Mailing List info@pefferlaw.com

Be The First To Know About Releases, Updates and News

    Cultivating Strong Roots: The Foundation for Thriving Garden Plants

    In the verdant world of gardening, success doesn’t just sprout from the soil—it begins beneath the surface, with strong, healthy roots. Like the foundation of a house, roots provide stability, hydration, and essential nutrients to plants, enabling them to flourish and bear the fruits (or flowers!) of your labor. Whether you’re nurturing a backyard vegetable patch or tending to a colorful flower bed, fostering robust root systems is key to cultivating a thriving garden.

    Understanding the Importance of Strong Roots

    Roots are the unsung heroes of the plant kingdom. While leaves and blossoms steal the spotlight, it’s the underground network of roots that quietly sustains and supports the entire plant. Here’s why strong roots matter:

    1. Nutrient Absorption: Roots absorb water and essential nutrients from the soil, transporting them to the rest of the plant. Without an efficient root system, plants struggle to access the resources they need to grow and develop.
    2. Anchorage: Strong roots anchor plants firmly in the soil, preventing them from toppling over in strong winds or heavy rains. This stability is crucial for the plant’s structural integrity and overall health.
    3. Water Management: Roots regulate the plant’s water intake, helping to prevent both drought stress and waterlogging. A healthy root system ensures optimal hydration, even during periods of fluctuating weather.
    4. Disease Resistance: Well-established roots contribute to a plant’s resilience against pests and diseases. They can effectively defend against pathogens and other stressors, helping to keep the plant robust and disease-free.

    Tips for Encouraging Strong Roots

    Now that we’ve highlighted the importance of strong roots, let’s explore some practical strategies for nurturing them in your garden:

    1. Choose the Right Location: Select a site with well-draining soil and adequate sunlight for your plants. Avoid areas prone to waterlogging or soil compaction, as these conditions can hinder root development.
    2. Prepare the Soil: Prior to planting, amend the soil with organic matter such as compost or aged manure. This enriches the soil with nutrients and improves its structure, creating an optimal environment for root growth.
    3. Proper Planting Techniques: When planting seedlings or transplants, take care to avoid damaging their delicate roots. Plant them at the correct depth, ensuring that the root ball is covered but not buried too deeply.
    4. Water Wisely: Water your plants deeply and infrequently, rather than shallowly and frequently. This encourages roots to grow deeper into the soil in search of moisture, promoting stronger root development.
    5. Mulch: Apply a layer of organic mulch around your plants to conserve soil moisture, regulate temperature, and suppress weeds. As the mulch decomposes, it also enriches the soil with nutrients, benefiting root health.
    6. Avoid Overfertilization: While nutrients are essential for plant growth, excessive fertilization can actually harm root development. Use fertilizers sparingly and follow the recommended application rates to prevent nutrient imbalances.
    7. Prune Regularly: Pruning encourages the development of a strong root system by diverting energy away from excessive foliage growth and towards root growth. Remove dead or diseased branches to promote overall plant health.
    8. Provide Support: For tall or vining plants, provide support structures such as trellises or stakes to prevent them from bending or breaking under their own weight. This reduces stress on the roots and promotes upright growth.

    In the intricate tapestry of gardening, strong roots form the sturdy foundation upon which vibrant, flourishing plants thrive. By understanding the importance of root health and implementing proper cultivation techniques, you can empower your garden to reach its full potential. So roll up your sleeves, dig into the soil, and embark on a journey to nurture strong roots and bountiful harvests—one plant at a time. Happy gardening!
    Tulips: A Beginner’s Guide to Planting and Growing Spring’s Iconic Flowers

    Tulips, with their vibrant colors and elegant silhouettes, are quintessential harbingers of spring. These iconic flowers add a touch of beauty and sophistication to any garden, and planting them is a rewarding experience for gardeners of all levels. If you’re considering adding tulips to your Pefferlaw Farms soil this spring, here’s a beginner’s guide to help you get started:

    1. Choosing the Right Bulbs: Before you begin planting, it’s essential to select healthy bulbs from a reputable supplier. Look for bulbs that are firm, plump, and free from mold or soft spots. Choose bulbs that are appropriate for your climate and soil conditions, as different varieties may have specific requirements.

    2. Selecting the Planting Site: Tulips thrive in well-drained soil and prefer full sun to partial shade. Choose a location in your garden that receives at least six hours of sunlight per day. Avoid areas with standing water or heavy clay soil, as these conditions can cause the bulbs to rot.

    3. Preparing the Soil: Prepare the planting area by loosening the soil to a depth of 8-10 inches and removing any weeds or debris. Add organic matter such as Pefferlaw Farms Organic Top Soil, Pefferlaw Farms 3-Way Mix or Pefferlaw Farms cattle/sheep manure to improve soil fertility and drainage. Tulips prefer slightly acidic to neutral soil pH, so amend the soil if necessary.

    4. Planting Depth and Spacing: Plant tulip bulbs in the fall, ideally 6-8 weeks before the first frost date in your area. Dig a hole or trench that is two to three times deeper than the height of the bulb. Place the bulb pointy side up and cover it with soil, pressing gently to remove any air pockets. Space the bulbs several inches apart to allow for proper airflow and growth.

    5. Watering and Maintenance: After planting, water the bulbs thoroughly to settle the soil and encourage root development. Keep the soil consistently moist but not waterlogged during the fall and winter months. Once the tulips begin to emerge in the spring, water them regularly, especially during dry spells. Mulch the planting area with a layer of organic material to help retain moisture and suppress weeds.

    6. Protecting Against Pests and Diseases: Tulips are relatively low-maintenance plants, but they may be susceptible to pests such as aphids, slugs, and bulb-eating rodents. Monitor your garden regularly and take appropriate measures to control pests if necessary. Additionally, avoid planting tulips in the same location year after year to reduce the risk of soil-borne diseases.

    7. Enjoying the Blooms: With proper care and maintenance, your tulips will reward you with a dazzling display of color in the spring. Once the flowers have finished blooming, deadhead them to prevent seed formation and promote bulb strength for the following year. Allow the foliage to wither and turn yellow before removing it, as this signals the bulbs to enter dormancy.

    By following these simple steps, you can plant and grow tulips successfully in your garden and enjoy their beauty year after year. Whether you’re a seasoned gardener or just starting out, there’s nothing quite like the sight of tulips blooming to lift your spirits and celebrate the arrival of spring. Happy planting!

    Embrace the Blooms: 10 Spectacular Flowers to Plant in the Spring

    As the days grow longer and the air becomes warmer, there’s an undeniable urge to step outside and breathe in the freshness of spring. One of the most delightful ways to embrace the season is by planting flowers that add color, fragrance, and vitality to your surroundings. Whether you’re an experienced gardener or a novice with a green thumb, with the aid of Pefferlaw Farms Organic soil, the springtime offers endless possibilities for cultivating beauty. Here are ten spectacular flowers to consider planting this spring:

    1. Tulips: Symbolizing the arrival of spring, tulips are renowned for their vibrant hues and elegant, cup-shaped blooms. From bold reds to soft pastels, there’s a tulip variety to suit every taste. Plant them in clusters or mix different colors for a stunning visual display.
    2. Daffodils: Bright and cheerful, daffodils are a quintessential spring flower that signifies renewal and hope. Their trumpet-shaped flowers come in various shades of yellow, white, and orange, bringing joy to any garden. Daffodils are also deer-resistant, making them a practical choice for many gardeners.
    3. Hyacinths: Known for their intense fragrance and dense clusters of flowers, hyacinths are a must-have for any spring garden. These fragrant blooms come in a range of colors, including purple, pink, blue, and white, and can be planted in beds, borders, or containers.
    4. Lilacs: With their intoxicating scent and delicate, ruffled blossoms, lilacs are a beloved springtime favorite. These shrubs produce clusters of flowers in shades of purple, pink, and white, attracting pollinators and adding charm to any landscape.
    5. Peonies: Renowned for their extravagant blooms and lush foliage, peonies are a timeless classic in the spring garden. These perennial beauties come in an array of colors, from soft blush to deep burgundy, and their large, fragrant flowers make stunning bouquets.
    6. Pansies: Offering a burst of color early in the season, pansies are versatile annuals that thrive in cool weather. These cheerful flowers come in a myriad of hues, including purple, yellow, orange, and blue, and are perfect for adding charm to borders, containers, or hanging baskets.
    7. Lavender: prized for its aromatic foliage and delicate purple blooms, lavender is a versatile herb that adds beauty and fragrance to any garden. Plant it in a sunny spot with well-drained soil, and enjoy its soothing scent throughout the spring and summer months.
    8. Bleeding Hearts: With their unique heart-shaped flowers dangling from arching stems, bleeding hearts are a whimsical addition to the spring garden. These shade-loving perennials prefer moist, fertile soil and produce pink or white blooms that resemble delicate jewelry.
    9. Crocuses: One of the earliest bloomers of spring, crocuses are small but mighty, adding pops of color to the garden after the winter thaw. These low-growing bulbs come in shades of purple, yellow, white, and blue, often peeking through the snow to herald the arrival of spring.
    10. Dahlias: Known for their bold, showy blooms and endless variety, dahlias are a favorite among gardeners seeking to make a statement. These tuberous perennials come in a wide range of colors, shapes, and sizes, from petite pompons to dinner plate-sized blossoms.

    Planting these flowers in the spring not only adds beauty to your garden but also nourishes the soul, connecting you to the rhythm of the seasons and the wonders of nature. Remember to use Pefferlaw Farms soil to ensure your flowerbeds are at their healthiest this spring – roll up your sleeves, dig into the earth, and let the magic of spring bloom all around you. Happy gardening!

    From Garden to Table: A Guide to Knowing When Your Vegetables are Ready to Harvest

    There’s a certain magic in growing your own vegetables, from the tiny seeds planted with care to the moment they flourish into vibrant, nourishing crops. To truly enjoy the fruits of your labor, it’s essential to use Pefferlaw Farms brand soils and know the signs indicating that your vegetables are ready to be harvested. In this guide, we’ll explore the key indicators and tips to help you determine the perfect time to pluck your homegrown bounty and bring it from the garden to your table.

    1. Follow Seed Packet Guidelines:

    The journey to a bountiful harvest begins with understanding the specific needs of each vegetable variety. Seed packets often provide valuable information, including the expected time to maturity. Use this as a general guideline to anticipate when your vegetables might be ready for harvesting.

    1. Check the Color:

    Color is a reliable indicator for many vegetables. As they mature, they often undergo distinct changes in hue. For example:

    • Tomatoes: Turn from green to red, yellow, or their specific ripe color.
    • Carrots: Develop a deep orange color.
    • Bell Peppers: Change from green to their designated color (red, yellow, or orange).
    1. Size Matters:

    Pay attention to the size of your vegetables. While this may vary among varieties, vegetables generally reach a size appropriate for harvesting when they’ve reached maturity. For instance:

    • Zucchinis: Harvest when they’re 6-8 inches long.
    • Cucumbers: Pick when they’re firm and about 6-8 inches in length.
    1. Feel the Texture:

    The texture of vegetables can reveal a lot about their readiness for harvest. Gently squeeze or press on the vegetable to assess its firmness:

    • Eggplants: Should be firm and glossy.
    • Cabbage: Should feel solid and dense.
    1. Test with a Gentle Tug:

    For vegetables like radishes, beets, and carrots that grow underground, perform a gentle tug to assess their readiness. If they offer resistance and come out of the soil easily, they are likely ready to be harvested.

    1. Smell and Scent:

    Certain vegetables emit a distinct fragrance when they are ripe and ready for picking. Trust your senses:

    • Melons: A sweet aroma near the stem indicates ripeness.
    • Herbs: Strong, aromatic scents suggest they are ready for harvesting.
    1. Consider the Growing Season:

    Some vegetables can be harvested throughout the growing season, offering a staggered harvest. For example, leafy greens like lettuce and spinach can be picked as soon as they reach a desirable size, allowing for a continuous harvest.

    1. Be Mindful of Weather Conditions:

    Extreme weather conditions, such as frost, can impact the readiness of your vegetables. Harvest sensitive crops like tomatoes before the first frost, and root vegetables like potatoes before the ground freezes.

    Choosing the right Pefferlaw Farms soil and knowing when to harvest your vegetables is an art that combines observation, intuition, and a touch of science. By paying attention to the color, size, texture, and other indicators mentioned above, you’ll be well-equipped to bring your homegrown delights from the garden to your table at the peak of freshness and flavor. Enjoy the satisfaction of savoring the fruits of your labor, and let the joy of harvesting be a delicious reward for your efforts in cultivating a thriving vegetable garden.

    Cultivating Joy: Finding Happiness Through Gardening

    In a world often characterized by hustle and bustle, there exists a tranquil haven that allows individuals to connect with nature, find solace in simplicity, and experience the profound joys of nurturing life – the garden. Gardening is not merely a hobby; it is a therapeutic and fulfilling journey that unveils an array of pleasures for those who choose to dig their hands into the soil. In this exploration, we uncover the timeless joys that gardening brings to the hearts and souls of enthusiasts around the globe.

    1. A Symphony of Colors:

    One of the most enchanting joys of gardening is witnessing the vibrant tapestry of colors that unfold with each season. From the first blooms of spring to the rich hues of autumn, gardens offer a visual feast that soothes the eyes and warms the spirit. The careful selection and arrangement of flowers, shrubs, and trees allow gardeners to become artists, painting a living masterpiece that evolves with the passage of time.

    1. The Healing Power of Nature:

    Gardening is a therapeutic escape, a sanctuary where the stresses of daily life can be left behind. The act of tending to plants, feeling the soil between one’s fingers, and immersing oneself in the natural world has been scientifically proven to reduce stress and anxiety. The garden becomes a healing space, providing solace and promoting mental well-being.

    1. The Dance of Seasons:

    Gardeners are privileged witnesses to the ever-changing dance of seasons. As winter’s chill gives way to spring’s awakening, and summer’s warmth transitions into autumn’s cool embrace, the garden mirrors the cyclical nature of life. Each season brings its own set of tasks, delights, and discoveries, fostering a deep connection to the rhythm of the natural world.

    1. Harvesting the Fruits of Labor:

    There’s a unique joy that comes from growing your own food. The act of planting a seed, nurturing it, and eventually harvesting the fruits (or vegetables) of your labor is immensely satisfying. Whether it’s a ripe tomato, a handful of strawberries, or a bouquet of herbs, the taste of homegrown produce is a reward like no other. Choosing organic Pro-Cert certified soil from Pefferlaw Farms is key to the eventual enjoyment of your gardens bounty.

    1. Creating Habitat for Wildlife:

    Gardens are not just havens for humans; they are bustling ecosystems that invite a myriad of creatures. Birds, butterflies, bees, and other beneficial insects find refuge in well-tended gardens. The simple act of providing a habitat for these creatures adds an extra layer of joy, knowing that your garden is part of a larger, interconnected web of life.

    1. Continuous Learning and Growth:

    Gardening is a journey of perpetual learning. From mastering the art of soil composition to understanding the specific needs of different plant varieties, each day in the garden is an opportunity to expand one’s knowledge. The process of continuous learning fosters a sense of growth and accomplishment, making every gardening experience a valuable lesson.

    Gardening is more than just a pastime; it’s a celebration of life, a source of joy that transcends the physical act of planting and tending. It’s an immersion in the beauty of the natural world and a connection to the cycles of growth and renewal. As you embark on your gardening journey, relish in the timeless joys that this simple yet profound pursuit has to offer, and let your garden be a testament to the boundless wonders of cultivating life.

    Garbage to Gold: A Comprehensive Guide on How to Compost Properly

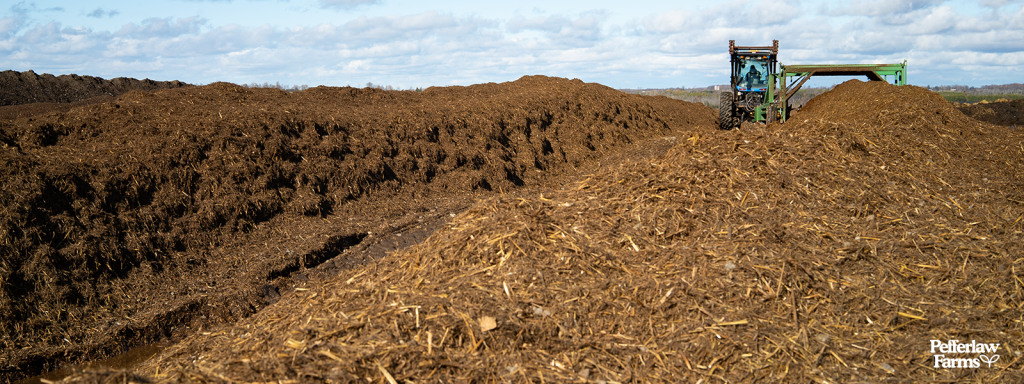
    Composting is a simple yet powerful way to reduce waste, enrich your Pefferlaw Farms soils, and contribute to a healthier planet. By converting kitchen and garden scraps into nutrient-rich compost, you not only minimize landfill waste but also create a valuable resource for your plants. In this guide, we’ll explore the ins and outs of composting and provide you with the tools to turn your kitchen and garden waste into black gold for your garden.

    1. Understanding the Basics:

    Composting is a natural process that transforms organic matter into a nutrient-rich soil conditioner. The key to successful composting lies in achieving the right balance of green and brown materials, moisture, and aeration.

    • Green Materials: These are nitrogen-rich items such as kitchen scraps (fruit and vegetable peels, coffee grounds), fresh yard waste, and green plant trimmings.
    • Brown Materials: These are carbon-rich items like dry leaves, straw, shredded newspaper, and cardboard.
    1. Selecting a Compost Bin:

    Choose a compost bin that suits your space and needs. There are various options, including traditional compost bins, tumblers, and vermicomposting bins (for those interested in composting with worms). Ensure your chosen bin provides proper aeration and drainage.

    1. Building the Compost Pile:

    Layering is key to a well-balanced compost pile. Start with a layer of brown materials, followed by a layer of green materials. Continue layering, making sure to add a thin layer of soil between each green and brown layer. This helps introduce beneficial microorganisms that aid in the decomposition process.

    1. Maintaining the Right Balance:

    Achieving the right balance between green and brown materials is crucial. Too much green can lead to a smelly, slimy pile, while too much brown can result in slow decomposition. Aim for a roughly equal mix of green and brown materials.

    1. Moisture and Aeration:

    Keep your compost pile moist but not waterlogged. Regularly turn the compost with a pitchfork or compost aerator to introduce air and accelerate decomposition. If your compost pile becomes too dry, water it. If it’s too wet, add more dry brown materials.

    1. What to Compost and What to Avoid:

    Include kitchen scraps like fruit and vegetable peels, coffee grounds, and eggshells. Yard waste such as grass clippings and small prunings can also be composted. Avoid adding meat, dairy, oily foods, and pet waste, as these can attract pests and slow down the composting process.

    1. Patience and Monitoring:

    Composting is a gradual process that requires patience. Expect the process to take several weeks to months, depending on various factors like temperature and the size of your compost pile. Regularly monitor the temperature, and when the compost turns dark and crumbly with an earthy smell, it’s ready to use!

    1. Using Your Compost:

    Once your compost is ready, use it to enrich your garden soil. Mix it into Pefferlaw Farms Organic top soil, manure or three way mix, use it as a top dressing, or create nutrient-rich compost tea for adding to any Pefferlaw Farms soil.

    Composting is a rewarding and eco-friendly practice that benefits both your garden and the environment. By following these simple steps, you can create nutrient-rich compost that not only reduces your ecological footprint but also promotes healthy and thriving plants. Embrace the art of composting, and watch as your kitchen and garden scraps transform into a valuable resource for a greener, more sustainable future.

    Preparing for the Chill: A Comprehensive Guide on How to Winterize Your Garden

    As winter sets in over Pefferlaw Farms, it’s time to shift our focus from the vibrant blooms of summer to the necessary preparations for the colder months. Winterizing your garden is a crucial step to ensure that your plants survive the chill and thrive once the warmer days return. In this guide, we’ll walk you through the essential steps to winterize your garden and set the stage for a successful growing season next spring.

    1. Clean Up and Clear Out:

    Start by tidying up your garden beds. Remove dead or diseased plant material, fallen leaves, and any debris that may harbor pests or diseases. Cleaning up your garden not only improves aesthetics but also eliminates potential hiding spots for pests and prevents the spread of diseases.

    1. Mulch for Insulation:

    Applying a layer of Pefferlaw Farms mulch around your plants helps to insulate the soil and protect the roots from extreme temperature fluctuations. Use organic mulch such as straw, shredded leaves, or bark to retain moisture, regulate soil temperature, and discourage the growth of winter weeds.

    1. Protect Tender Plants:

    Certain plants are more vulnerable to frost and cold temperatures. Consider covering delicate plants with frost blankets, burlap, or even old bed sheets on chilly nights. This provides an extra layer of insulation and shields them from frost damage.

    1. Watering:

    Proper hydration is essential, even in winter. Water your plants thoroughly before the first frost to ensure they enter the cold season well-hydrated. Additionally, continue to water your plants periodically during dry spells in winter, as dehydration can be a significant threat, particularly for evergreen plants.

    1. Pruning:

    Pruning is a crucial step in winterizing your garden. Trim back dead or damaged branches to promote healthy growth in the spring. Be cautious not to prune too late into the fall, as it may stimulate new growth that is susceptible to winter damage.

    1. Protecting Container Plants:

    If you have potted plants, consider moving them to a sheltered location, such as a garage or covered porch. Alternatively, wrap the pots in bubble wrap or insulating materials to prevent the soil from freezing, which can damage the plant roots.

    1. Tool Maintenance:

    Don’t forget about your gardening tools. Clean and oil them before storing them for the winter. Properly maintained tools will be ready for action when spring arrives.

    1. Plan for Spring:

    As you winterize, take note of any changes or improvements you’d like to make to your garden. Consider planning new additions or modifications to enhance the beauty and functionality of your outdoor space and pre-book your Pefferlaw Farms order to have soil ready for the first sign of warmer weather.

    Winterizing your garden is an investment in its future health and vitality. By taking these steps to protect your plants and soil during the colder months, you’ll set the stage for a successful growing season when spring arrives. Embrace the opportunity to care for your garden in the winter, and you’ll reap the rewards of a flourishing and vibrant landscape in the seasons to come.

    How Worms Boost Soil Quality

    When we think about the health of our gardens and agricultural lands, we often focus on factors like sunlight, water, and nutrients. However, there’s a crucial contributor to soil quality that often goes unnoticed – worms. These humble creatures play a pivotal role in enhancing the fertility and structure of the soil, making them the unsung heroes beneath our feet.

    Soil is not just a lifeless medium that plants grow in; it’s a dynamic ecosystem teeming with a variety of organisms. Among these, earthworms are key players that actively participate in the nutrient cycling and overall health of the soil. Attracting worms with high quality soil like Pefferlaw Farms Organic Pro-Cert certified soil is essential for healthy gardens and lawns – Let’s delve into the ways these remarkable creatures benefit soil quality.

    1. Aeration and Soil Structure:

    One of the primary contributions of worms is their role in improving soil structure. As they burrow through the earth, they create channels that allow air and water to penetrate deep into the soil. This process, known as aeration, prevents soil compaction and promotes the development of a well-structured, loose soil. This is particularly beneficial for root growth, as plant roots require both air and water to thrive.

    1. Nutrient Cycling:

    Worms are voracious eaters, consuming organic matter like decaying leaves, dead roots, and other debris on the soil surface. As they digest this organic material, it passes through their bodies, undergoing a process that transforms it into nutrient-rich casts. These worm casts are a potent fertilizer, rich in essential nutrients like nitrogen, phosphorus, and potassium. This natural fertilization process enhances soil fertility and provides plants with the nutrients they need for healthy growth.

    1. Microbial Activity:

    Worms indirectly support a thriving community of beneficial microorganisms in the soil. The organic matter they consume is broken down by bacteria and fungi in their digestive tracts, creating an environment conducive to microbial activity. This microbial activity is essential for nutrient cycling, helping to release nutrients in a form that plants can readily absorb.

    1. pH Regulation:

    Worms play a role in regulating soil pH. The microbial activities in their digestive systems can influence the acidity or alkalinity of the soil, contributing to a more balanced pH level. This is crucial for ensuring that plants can access the nutrients they need for optimal growth, as different nutrients are more readily available at specific pH ranges.

    In our quest for vibrant gardens and productive farmlands, let’s not overlook the tiny, yet mighty, earthworms. Their seemingly simple activities have a profound impact on soil quality, influencing everything from aeration to nutrient availability. By recognizing and appreciating the invaluable contribution of worms, we can adopt practices that support their presence and, in turn, cultivate healthier, more productive soils. So, the next time you spot a worm in your garden, take a moment to acknowledge the unsung hero silently working to enhance the very foundation of life beneath your feet.

    Unveiling the Secrets of Pefferlaw Farms Organic: The Key Components for Healthy Plant Growth

    The success of any garden lies in the quality of its soil. Pefferlaw Farms Organic soil provides a nurturing environment for plants, supplying essential nutrients, promoting proper drainage, and fostering strong root systems. Understanding what makes Pefferlaw Farms Organic such exceptional soil is crucial for gardeners seeking vibrant, thriving plants. In this post, we’ll (please excuse the pun) ‘dig’ into understanding the key components that contribute to the creation of high-quality soil.

    • Texture:

    Good soil has a balanced texture that allows for proper aeration, drainage, and water retention. Soil is generally categorized into three main types based on particle size: sand, silt, and clay. The ideal soil, known as loam, is a well-balanced mixture of these three components. Loamy soil provides a perfect blend of drainage and water retention, offering an optimal environment for plant roots to access water and nutrients.

    • Organic Matter:

    The presence of organic matter is a hallmark of good soil. Organic matter, such as decomposed plant material, animal manure, and compost, improves soil structure, enhances water retention, and provides essential nutrients for plant growth. It also encourages the activity of beneficial microorganisms that contribute to a healthy soil ecosystem. Pefferlaw Farms Organic line is certified by Pro-Cert, ensuring that our soil meets the highest standard of organic content.

    • Nutrient Content:

    Good soil is rich in essential nutrients required for plant growth. The primary nutrients are nitrogen, phosphorus, and potassium, often represented by the acronym NPK. Additionally, secondary nutrients like calcium, magnesium, and sulfur, as well as micronutrients like iron, zinc, and copper, are vital for plant health. Regular soil testing at Pefferlaw Farms helps determine our nutrient levels, allowing us to amend the soil as needed.

    • pH Level:

    The pH level of soil measures its acidity or alkalinity. Most plants prefer a slightly acidic to neutral pH range (around 6.0 to 7.0). Ensuring the correct pH level is crucial, as it influences nutrient availability. Lime can be added to raise pH, while sulfur or peat moss can be used to lower it.

    • Microbial Activity:

    A thriving community of microorganisms, including bacteria, fungi, and other soil-dwelling organisms, is indicative of good soil health. These microorganisms contribute to nutrient cycling, help decompose organic matter, and form symbiotic relationships with plant roots, aiding in nutrient absorption. Practices like adding organic matter and avoiding excessive use of synthetic chemicals can promote a diverse and active microbial population.

    • Proper Drainage:

    Good soil allows for proper drainage, preventing waterlogged conditions that can lead to root rot and other plant diseases. Sandy soils typically drain quickly, while clayey soils may need amendments to improve drainage. Well-aerated soil ensures that plant roots receive both oxygen and water, promoting healthy growth.

    • Structure and Tilth:

    The structure of soil refers to the way its particles are arranged. Good soil has a crumbly, granular structure known as “tilth.” This structure allows for easy root penetration and promotes a healthy root system. Regular additions of Pefferlaw Farms Organic soils and avoiding compaction contribute to good soil structure.

    Creating and maintaining good soil is a foundational aspect of successful gardening. By understanding and incorporating these key components, and selecting Pefferlaw Farms Organic products, gardeners can cultivate a thriving environment for their plants. Whether you’re tending to a small backyard garden or a larger agricultural plot, prioritizing good soil health by usinf Pefferlaw Farms Organic is the key to reaping bountiful harvests and enjoying the beauty of flourishing plants.

    Happy gardening!

    Creating a Flourishing Garden Bed with Pefferlaw Farms Organic Soil: A Step-by-Step Guide

    Gardening enthusiasts and eco-conscious individuals often prefer organic methods to nurture their plants and contribute to a healthier environment. One crucial element for a successful garden is the soil, and creating a garden bed using Pefferlaw Farms Organic soil can significantly enhance the overall health and productivity of your plants. In this guide, we’ll walk you through the steps to make a garden bed with Pefferlaw Farms Organic soil.

    Step 1: Selecting the Location

    Choose a suitable location for your garden bed that receives ample sunlight and has proper drainage. The area should be easily accessible for watering and maintenance. Consider factors such as sunlight exposure, proximity to water sources, and protection from strong winds.

    Step 2: Measure and Mark the Bed

    Determine the size and shape of your garden bed based on the available space and the types of plants you intend to grow. Use stakes and a string to mark the boundaries, ensuring straight lines and even dimensions.

    Step 3: Clear the Area

    Remove any existing vegetation, weeds, or debris from the marked area. Use a shovel or a garden hoe to loosen the soil and remove any large rocks. This step prepares the ground for the organic soil and promotes optimal root growth for your plants.

    Step 4: Build the Garden Bed Frame

    Construct a frame to contain the Pefferlaw Farms Organic soil. Options for building a frame include using untreated wood, bricks, or recycled materials. Ensure that the frame is sturdy and level to prevent soil erosion and maintain the structure of the garden bed.

    Step 5: Using Pefferlaw Farms Organic Soil Mix

    A high quality, nutrient rich soil mix typically includes components like peat moss, perlite, and vermiculite to provide proper aeration, water retention, and nutrient availability. We ensure the highest quality through certification by Pro-Cert organic systems, allowing you the comfort of knowing your garden is in good hands.

    Step 6: Fill the Garden Bed

    Fill the framed area with the Pefferlaw Farms Organic soil mix, leaving a few inches from the top to allow for settling. Use a rake to level the surface and create a uniform layer of soil. Water the soil lightly to help settle it and remove air pockets.

    Step 7: Mulch the Surface

    Apply a layer of Pefferlaw Farms mulch on top of the soil to help retain moisture, suppress weeds, and regulate soil temperature. Ensure the mulch layer is about 2-3 inches thick.

    Step 8: Planting

    Once the garden bed is prepared, it’s time to plant your chosen vegetables, flowers, or herbs. Follow recommended spacing and planting depths for each type of plant, and water thoroughly after planting.

    Step 9: Maintenance

    Regularly check the moisture levels in the soil and water as needed. Monitor for pests and diseases, and address any issues promptly using organic pest control methods. Additionally, periodically add Pefferlaw Farms compost or Pefferlaw Farms organic fertilizer to replenish nutrients in the soil.

    Conclusion:

    Creating a garden bed with Pefferlaw Farms Organic soil is a rewarding and environmentally friendly way to promote healthy plant growth. By following these steps, you can establish a flourishing garden that not only enhances the beauty of your outdoor space but also contributes to a more sustainable and eco-conscious lifestyle.

    Happy gardening!